Day 3: Network Devices
30 Days of FrameFlow
Network Device Section and Organization
Today, let's add the first network devices to your FrameFlow configuration. To begin, navigate to the Network Devices section using the left sidebar menu. You'll notice that although you have no network devices connected, FrameFlow provides you with three suggested device groups to begin organizing your network devices. While you don't have to use the suggested groups, it's important to implement an organizational structure early so your workspace doesn't become cluttered later as you add network devices. Plus, categorizing your network devices and assigning device types can even unlock type-specific data and settings.
Adding Your First Devices
In Network Devices, click on the "Network Devices" group above the aforementioned three default groups. This will open a menu. From that menu, select "Add Network Device". This will open a menu where you can add the name or IP address of your device and choose the device type from a dropdown list, as shown in the GIF below. For now, don't worry about the profile options you may notice below these two settings. We'll expand on those options later in the 30 days.

Device Discovery
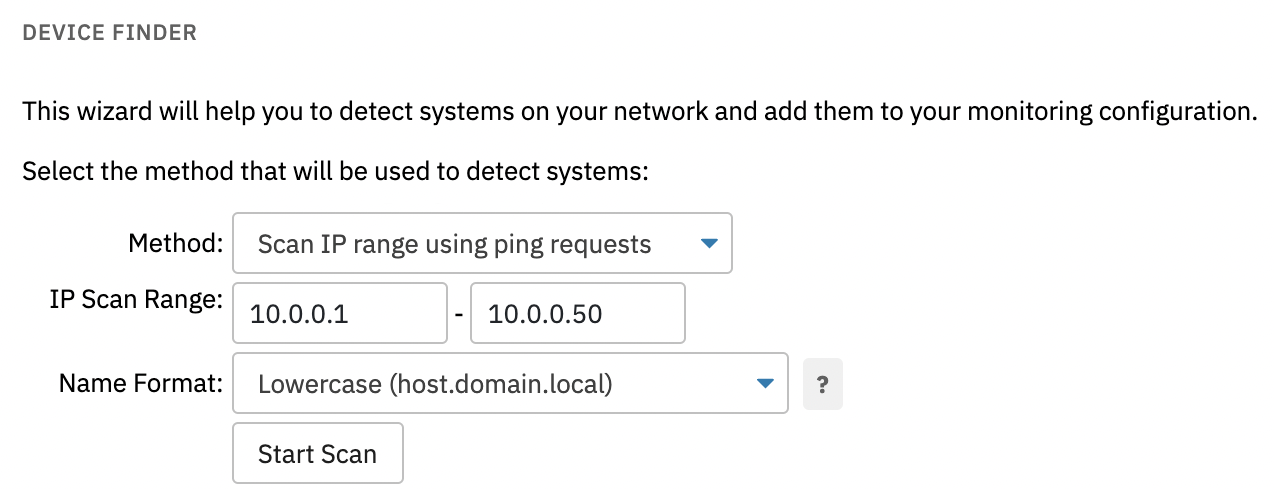
For organizations with hundreds or thousands of individual network devices, manually adding devices isn't ideal. That's why FrameFlow can also automatically onboard new network devices it discovers in your environment using a tool called Device Discovery. The device discovery setup can be found in the Tools section in the left sidebar. Here, just enter the IP range you want to scan, then choose a name format and start the scan. You'll receive a list of detected devices to choose from once the scan is complete.

The Device Discovery tool doesn't just find devices using ping requests, though. From the "Method" dropdown, you can also choose to scan Active Directory or scan using SNMP.
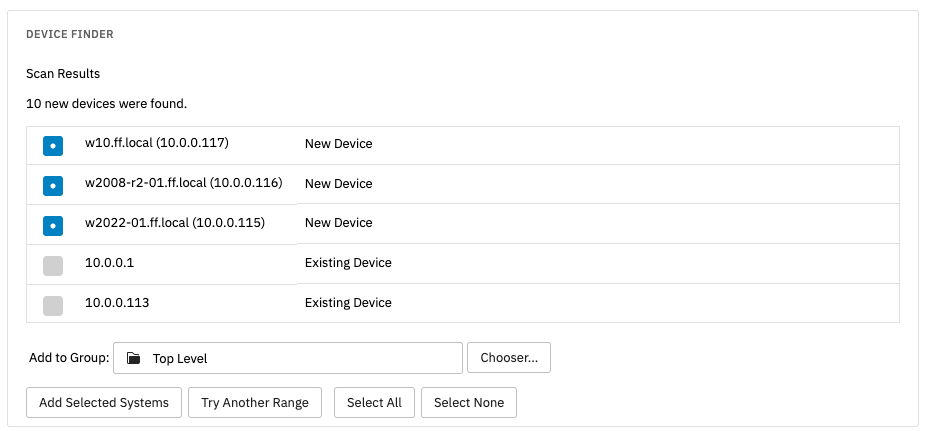
The Active Directory scan helps you pull in Windows devices from your Active Directory, while the SNMP-based scan will help detect SNMP-enabled devices on your network. Once you've chosen the scan method(s) that apply to you, run them one by one by filling in the info and pressing "Start Scan". Detected devices will be returned to you as below:

From here, just choose the devices you want to onboard and leave the rest behind.
Discovery Event Monitors
What if your environment has a constant influx of new network devices? Handy as it is, you don't want to be manually running device discovery all the time. FrameFlow's automation takes it a step further with our dedicated discovery event monitors.
In addition to the Device Discovery tool, we also offer event monitors that run on a schedule, constantly sweeping the chosen environment for new devices to onboard. Each discovery event monitor is specialized for a different device type. Just like in Device Discovery, we can find devices through ping, SNMP, and Active Directory. We also have discovery event monitors for AWS, Azure, and VMware.
Please explore the list of discovery event monitors and choose those that match your monitoring goals. Adding these monitors will save you time later that would have been spent onboarding these devices by hand.
Summary
Now that you have the tools to onboard manually and automatically through device discovery, we'll move forward assuming you now have some network devices to monitor. Tomorrow, we'll return and talk about the steps required to set up your first event monitors, so don't miss out!
| Day 2: FrameFlow's Interface | Day 4: First Event Monitors |
Table of Contents
Back to Menu
Day 1: Intro and Installation
Day 2: FrameFlow's Interface
Day 3: Network Devices
Day 4: Your First Event Monitors
Day 5: Authentication Profiles
Day 6: Security
Day 7: System Health Event Monitor
Day 8: Event Monitors by Category
Day 9: Headquarters
Day 10: Dashboards
Day 11: Alert Types
Day 12: PowerShell Scripting
Day 13: Event History
Day 14: Reports and Inventory Monitoring
Day 15: Network Monitoring
Day 16: Cloud Service Monitoring
Day 17: Cloud Cost Monitoring
Day 18: Activity Monitoring
Day 19: Maintenance Windows
Day 20: Dependencies
Day 21: VMware Monitoring
Day 22: Benefits of Organization
Day 23: Assigning Device Types
Day 24: Security Best Practices
Day 25: Database Monitoring
Day 26: Hardware Monitoring
Day 27: Installation Health Event Monitor
Day 28: Multi-Site and Remote Nodes
Day 29: Failover Monitoring
Day 30: More FrameFlow Resources
