Technical Resources
Single Sign-On with SAML
About Single Sign-On
SSO is an alternative security tool to two-factor authentication. Instead of sending a notification to your phone to authenticate, single sign-on uses SAML, a markup language that allows you to access multiple web applications using a single set of login credentials. FrameFlow now has the option to verify your account through Microsoft once at the beginning of the day, instead of having to use authentication like two-factor authentication multiple times throughout the day. This article will explain the procedure needed to begin using single sign-on to authenticate more conveniently.
Prerequisites to Azure Setup
1. Before starting the setup process, please verify that FrameFlow is already installed and set up through IIS. Then, log into portal.azure.com and check that your first Azure AD is already set up in Active Directory.
Azure Setup
2. From portal.azure.com, click on "Microsoft Entra ID".

3. Select "Enterprise Applications" from the menu.

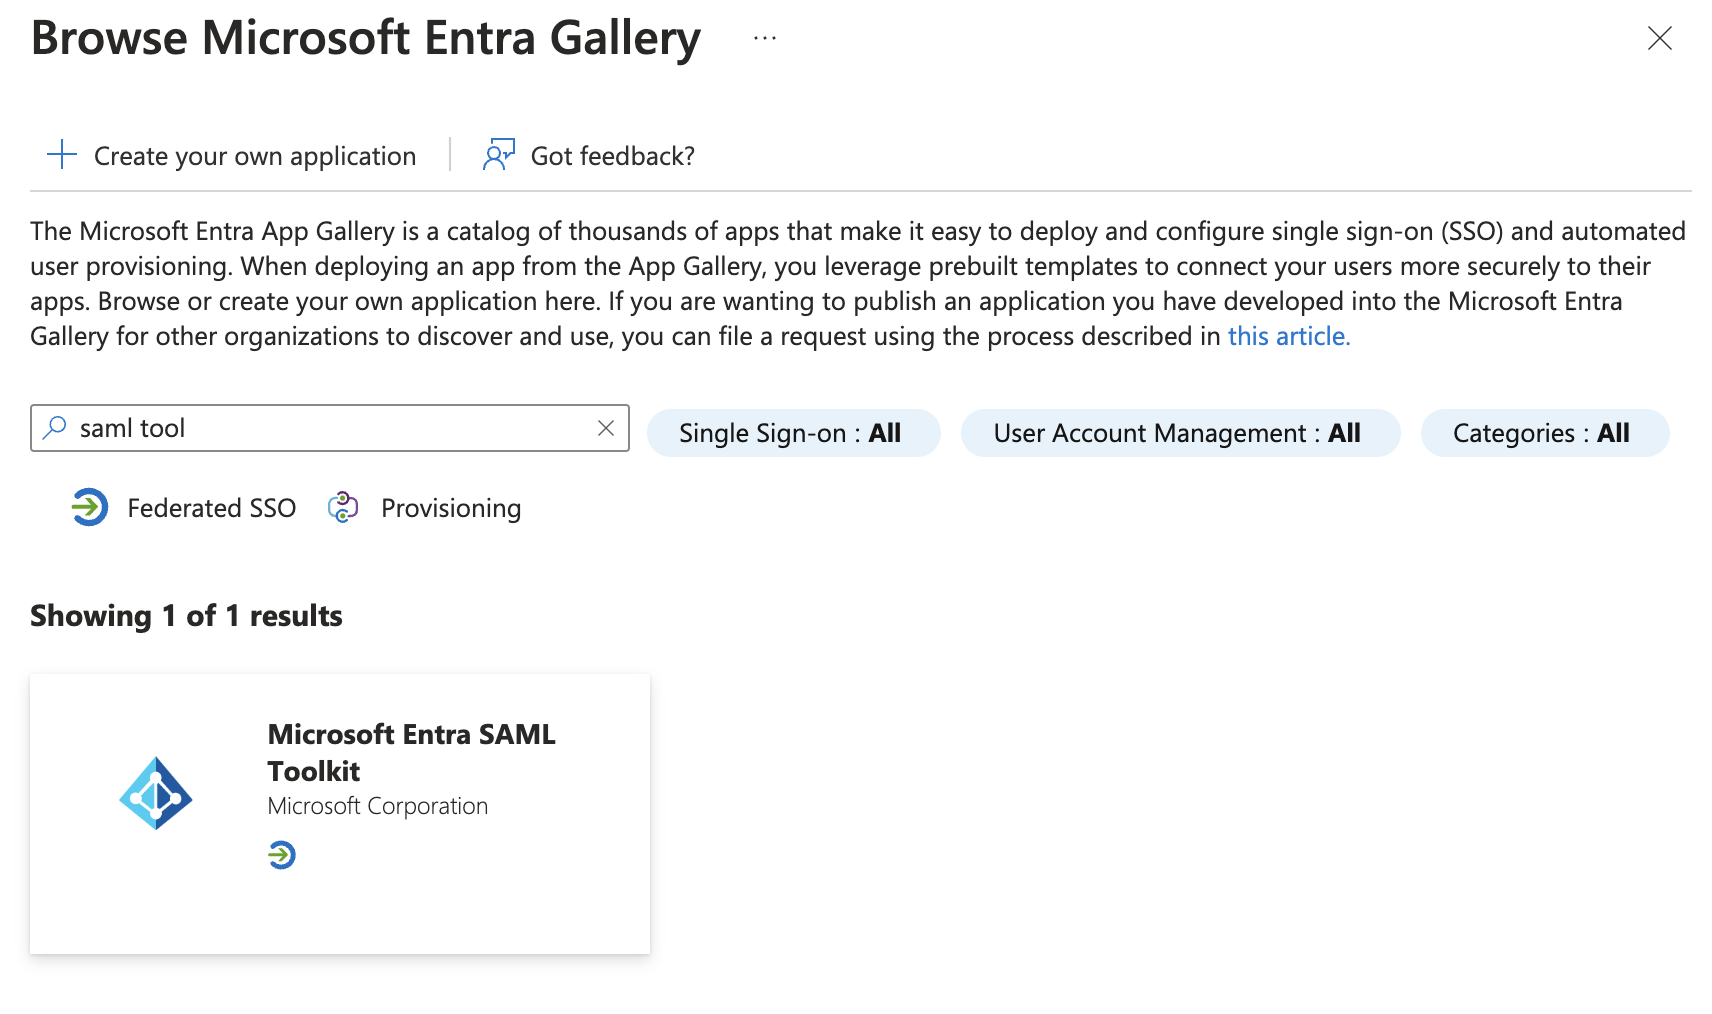
4. Click on "New Application" in the menu bar. This will open the Azure AD gallery, which has a search bar.

5. Type "SAML tool" into the search bar and select "Azure AD SAML Toolkit".
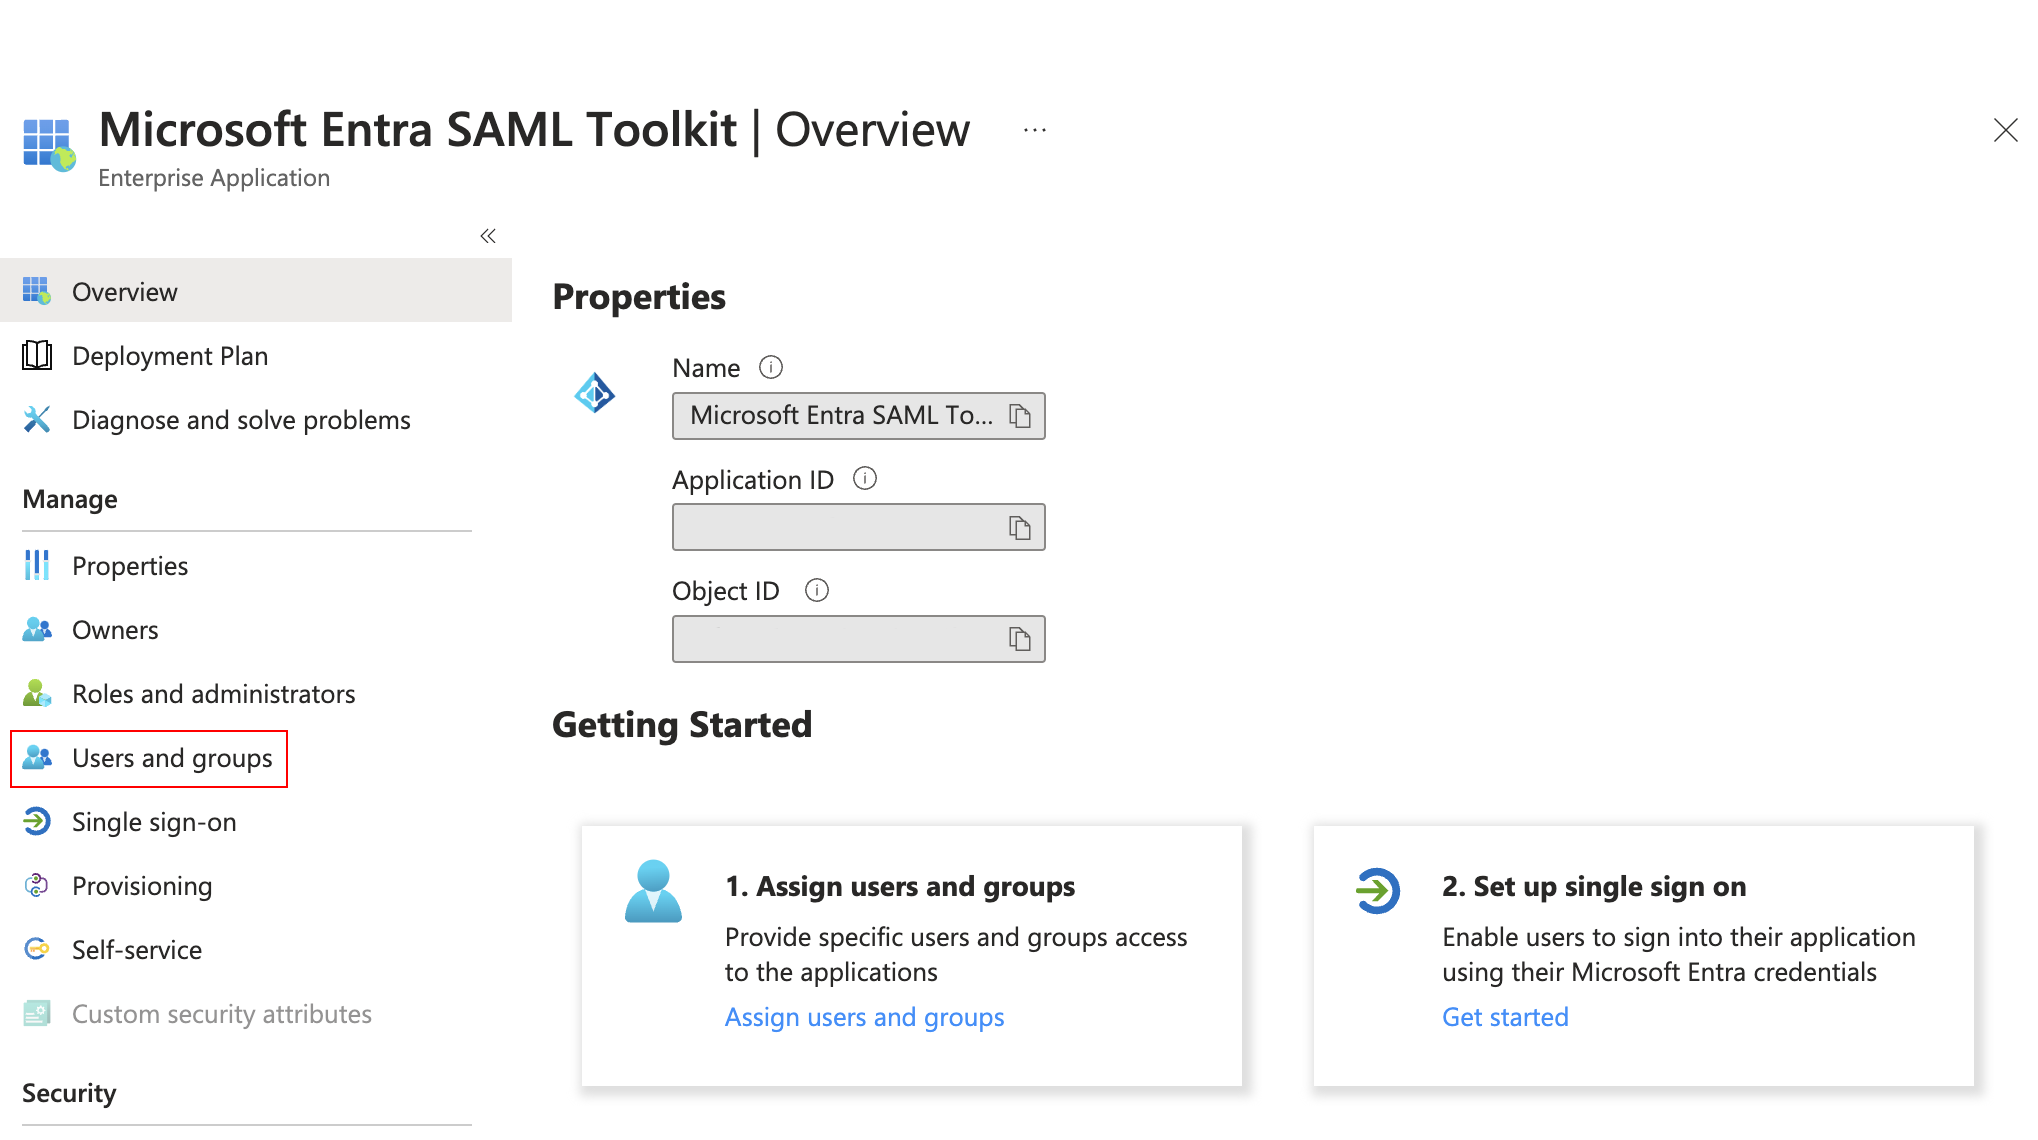
6. After the application is created, click on "Users and Groups" to grant SAML access to your team.
7. Click on "Add User/Group".

8. Click on "Users > None Selected".

9. Here, you can begin adding the users you want to have access to Single Sign-on. When you're done adding users, click "Select". Note: Users with the "Global Administrators" role are automatically included in this list by Microsoft Entra, even when not explicitly shown.
10. To apply your changes, click "Assign".
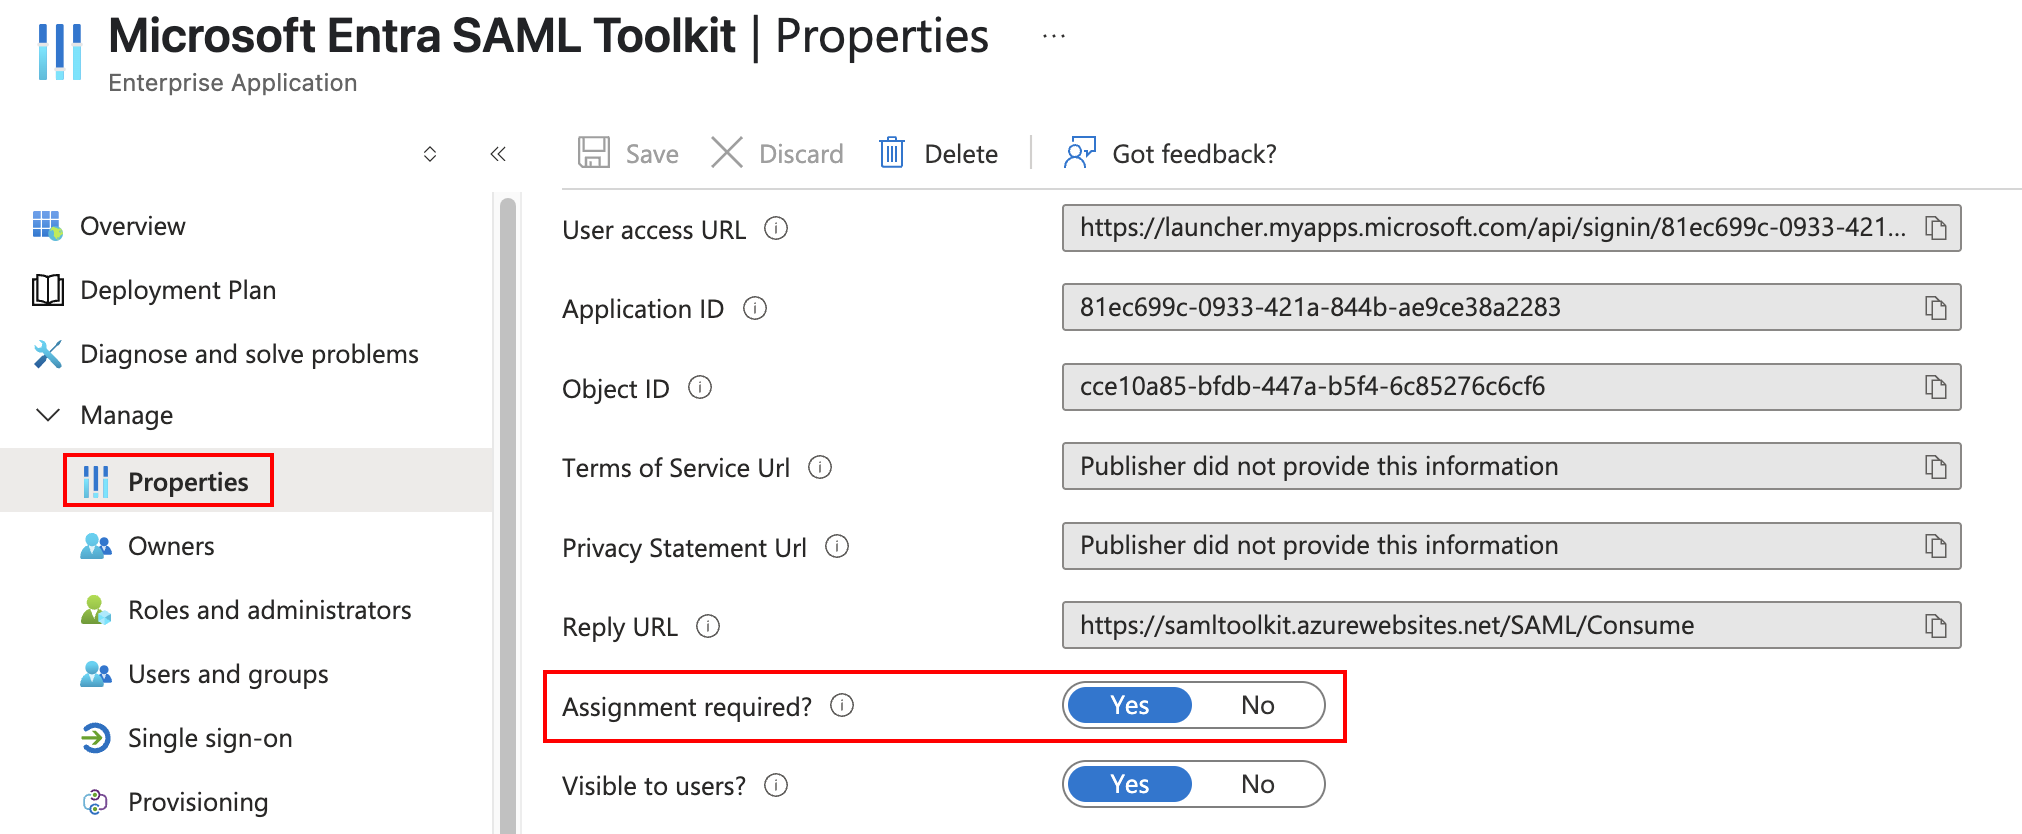
11. Back in the Azure Portal, Under "Manage" -> "Properties", ensure that "Assignment required" is set to yes. Otherwise, the user list is ignored and anyone in the tenant can be authenticated.
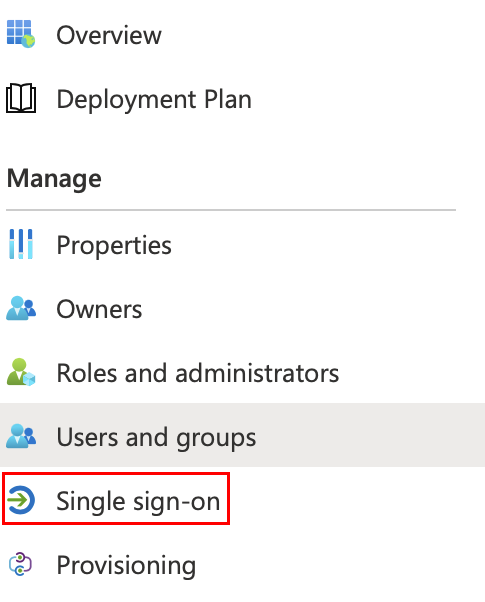
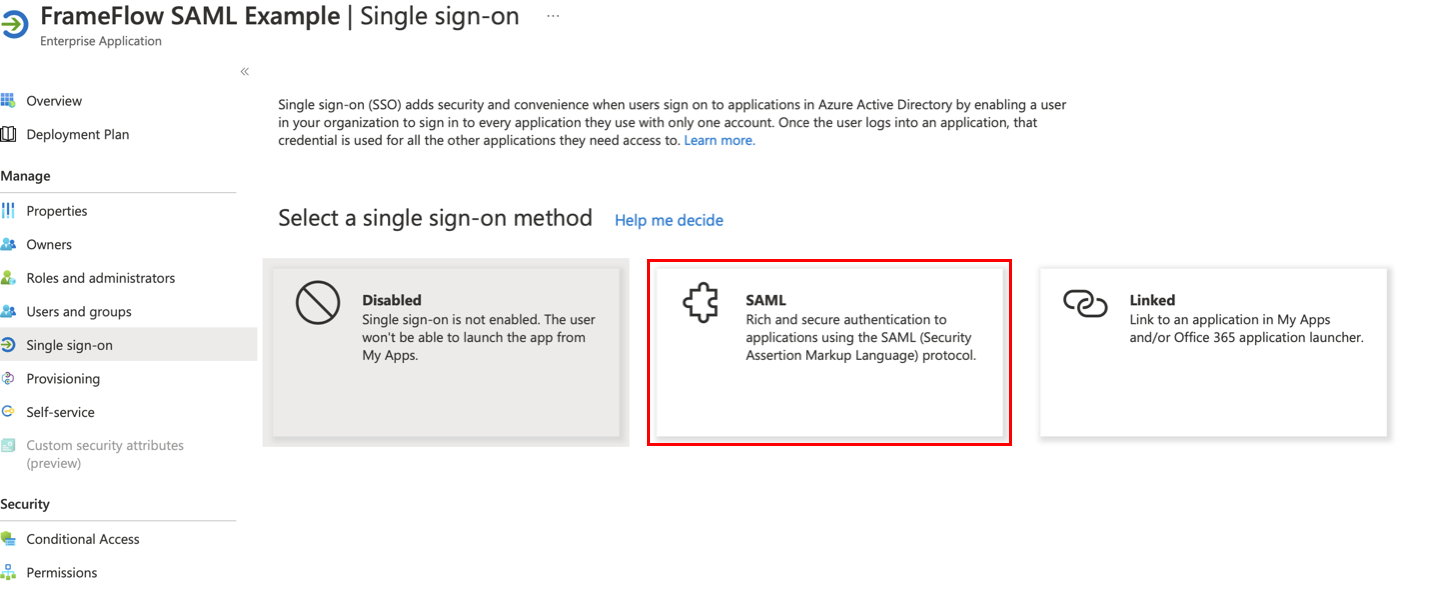
12. Click on "Single Sign-On".
13. Choose "SAML".
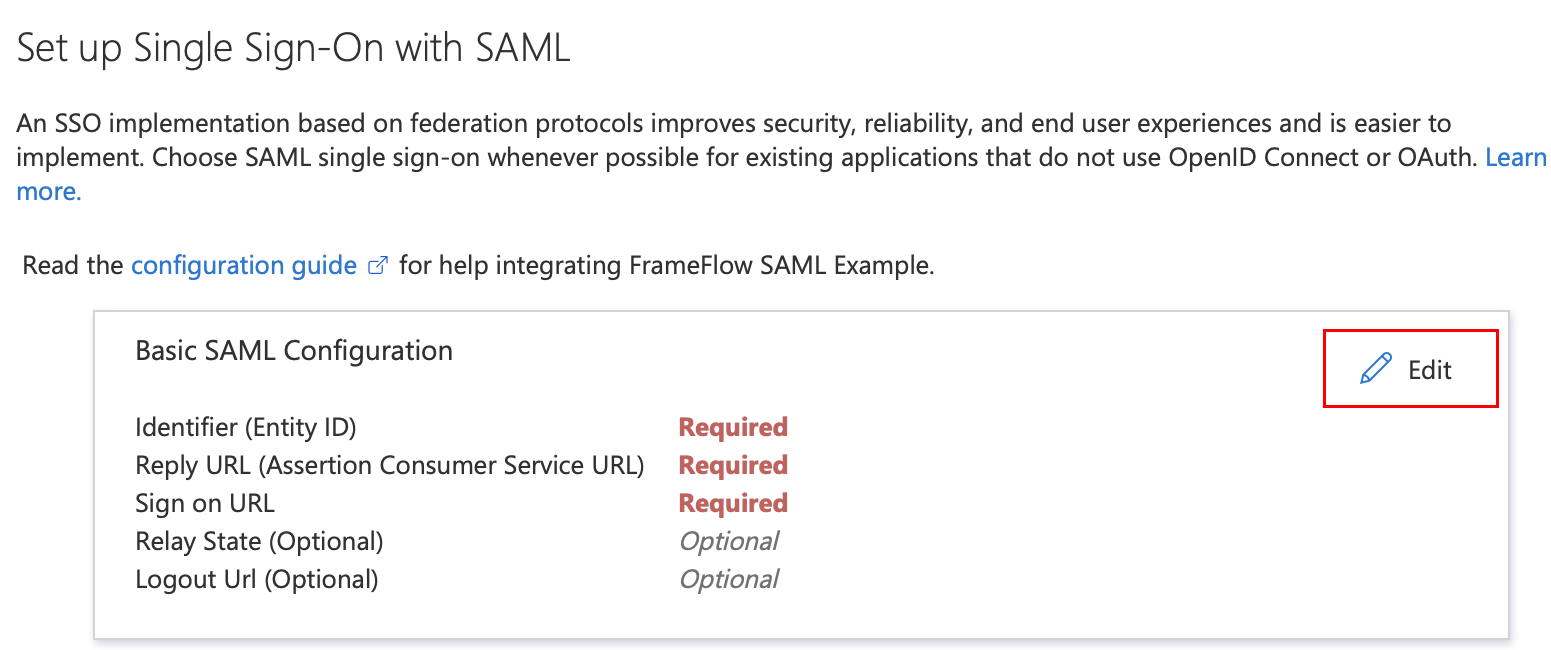
14. Click on the pencil icon to edit Basic SAML Configuration.
15. Enter the URL to your FrameFlow installation as the Identifier (Entity ID).
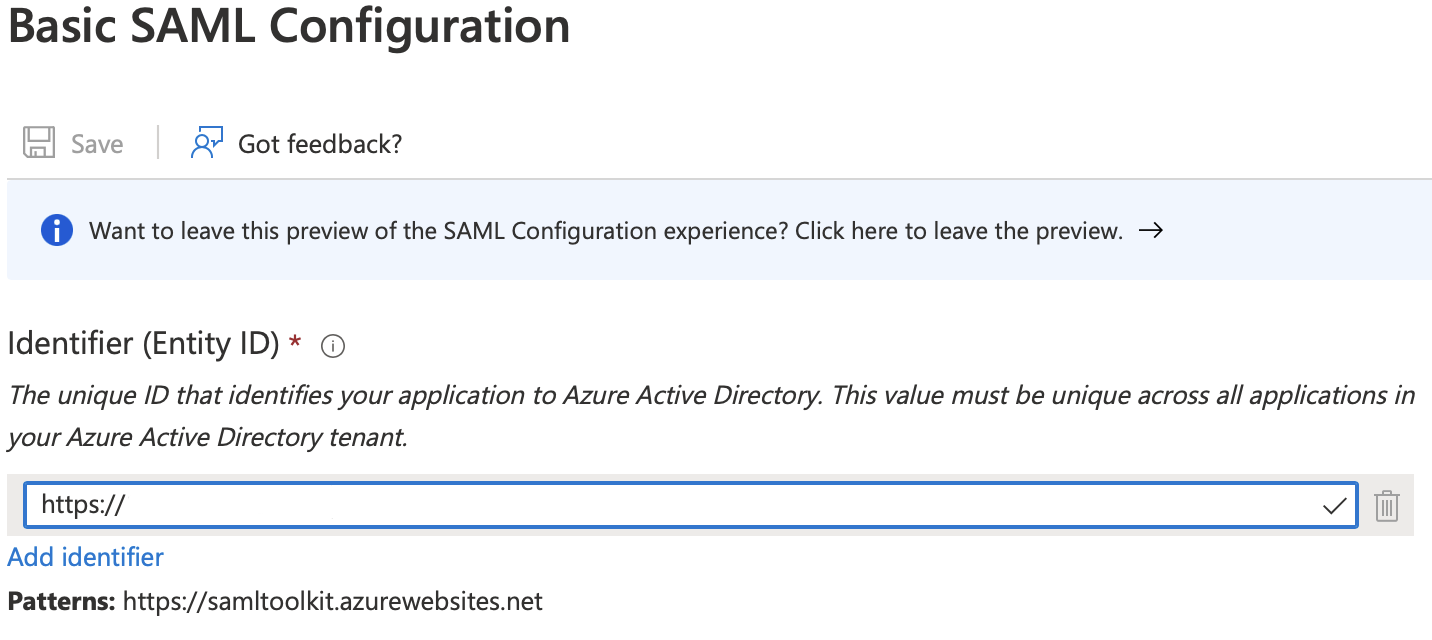
16. Click "Add Reply URL" and enter the same URL with "/saml.asp" at the end.

17. Enter the URL of your FrameFlow installation as the sign-on URL.

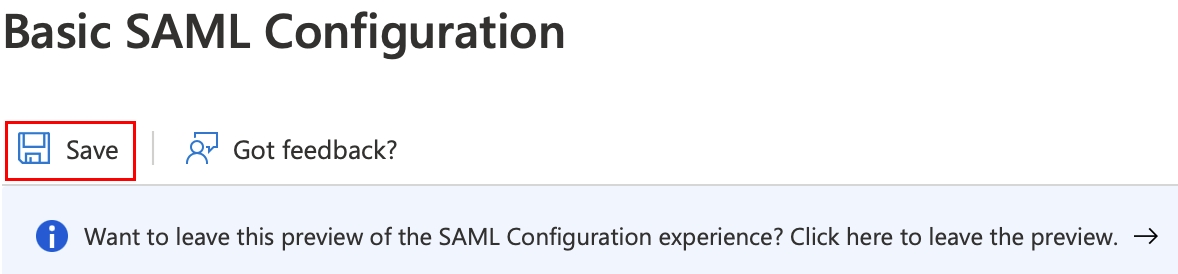
18. Click Save.
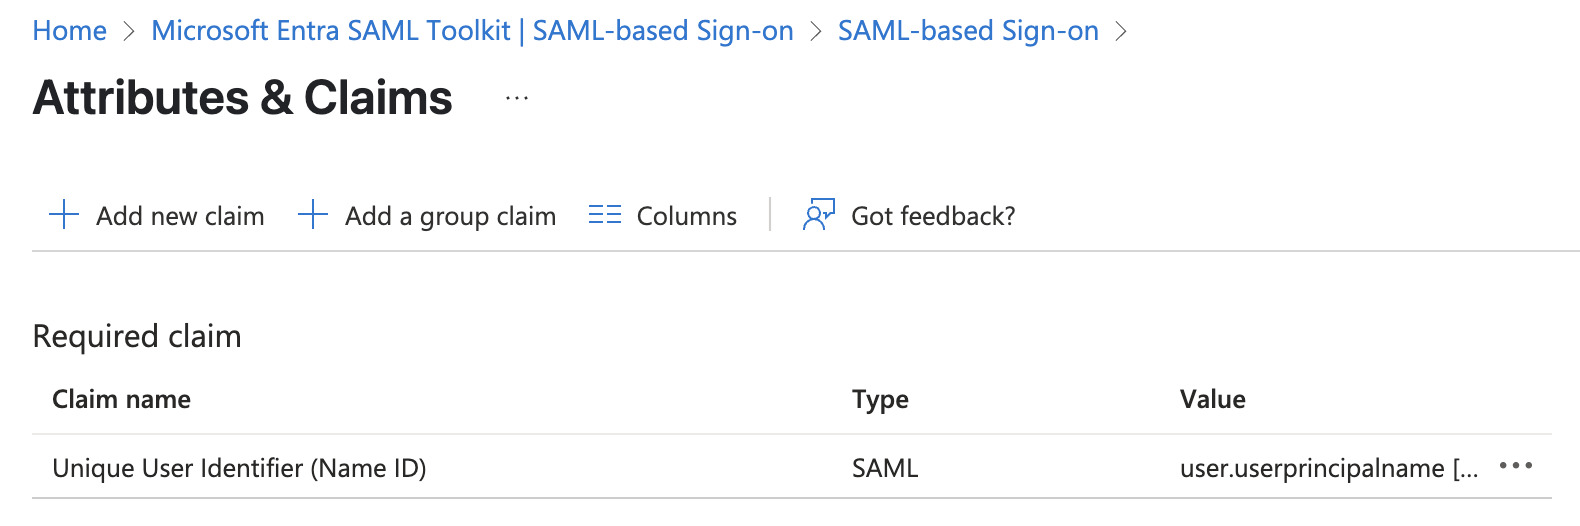
19. Edit the second box, "Attributes and Claims". Click "Add a Group Claim".
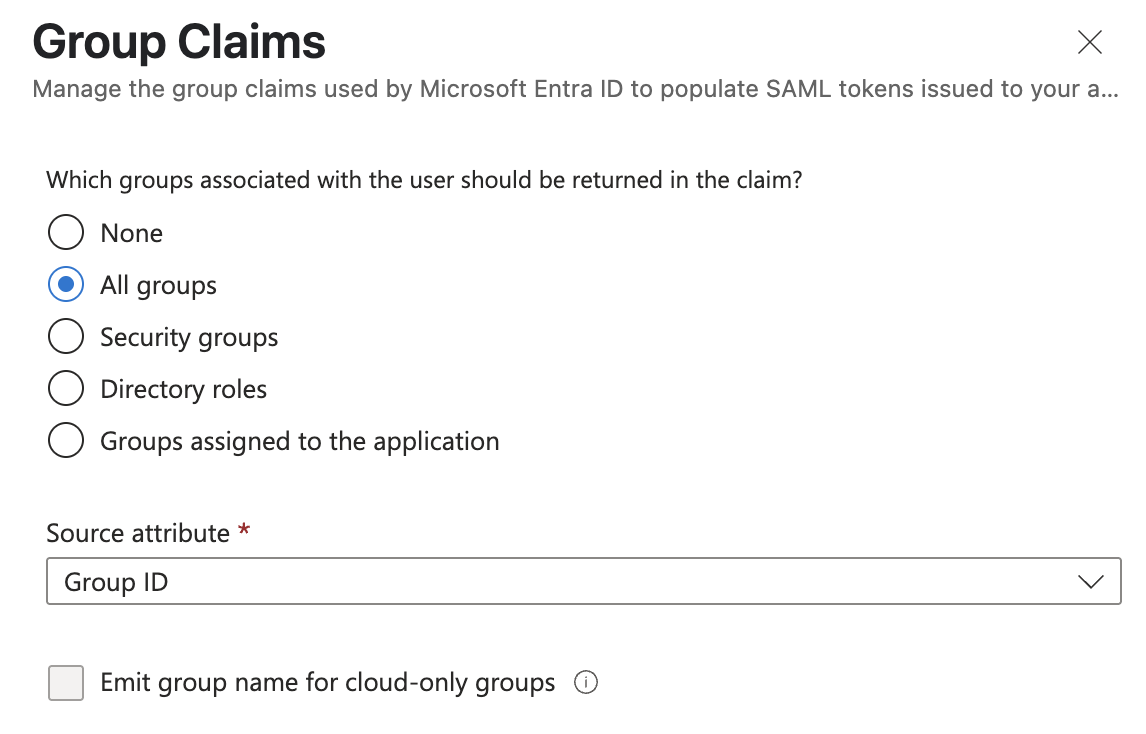
20. Choose “All groups” and make sure the “Source attribute” is “Group ID”, then click "Save".
21. Once these options are saved, close the "Basic SAML Configuration" window.
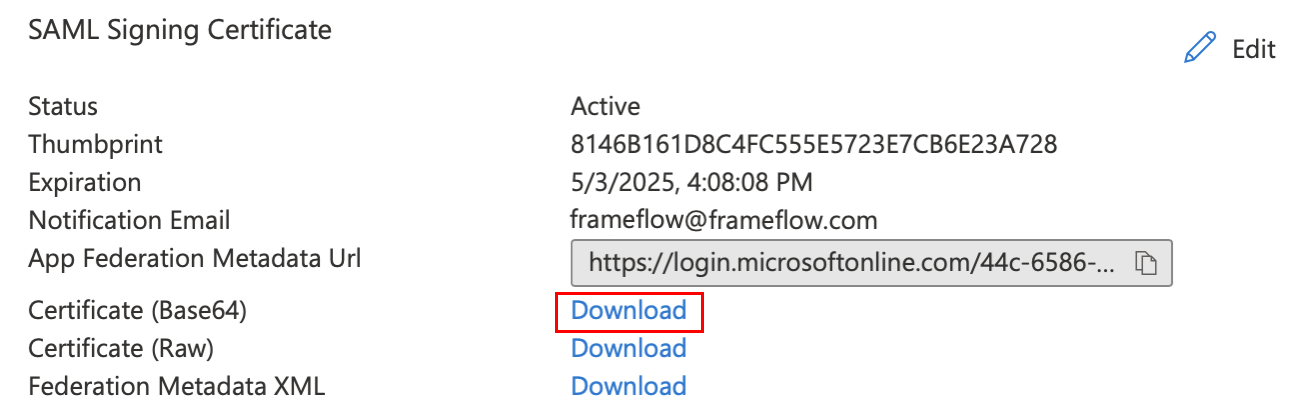
22. Scroll down to "SAML Certificates" and click Download (Base64) on the certificate.
23. Scroll down to part four: setup.
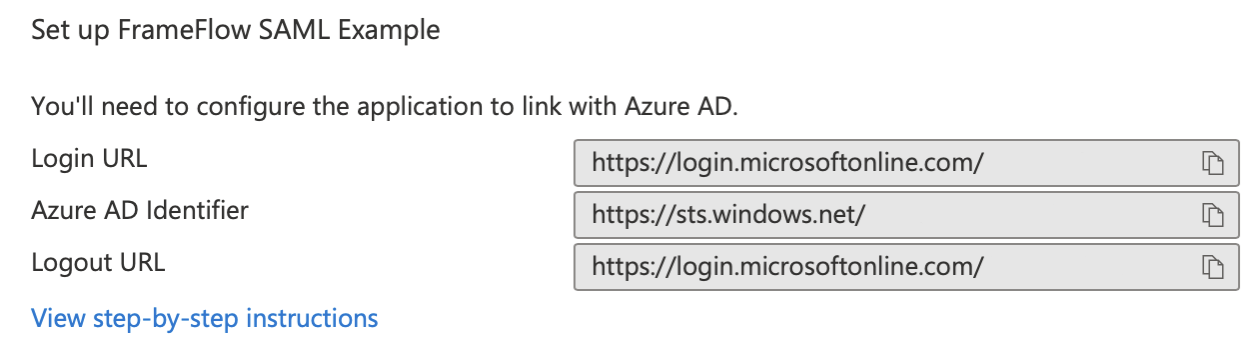
24. Make note of the login URL and the Azure AD identifier.
Setup Within FrameFlow
1. Log into FrameFlow as normal and go to Settings > Login and Security Settings.

2. In the section labeled "SAML", check "Allow SAML".

3. In the "Installation URL" field, enter the URL to your FrameFlow installation.
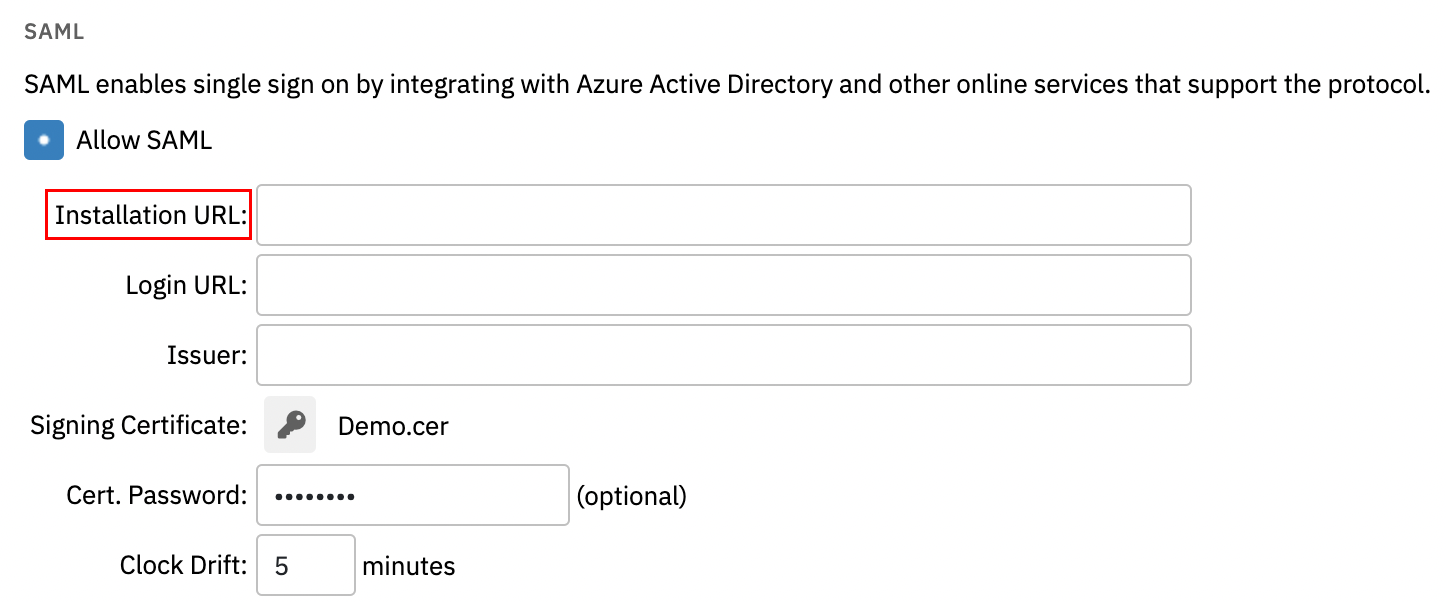
4. Enter the login URL you copied in step 24 into the Login URL field. The Azure AD identifier goes in the box labeled "Issuer".
5. Click the key button and select the certificate you downloaded above.
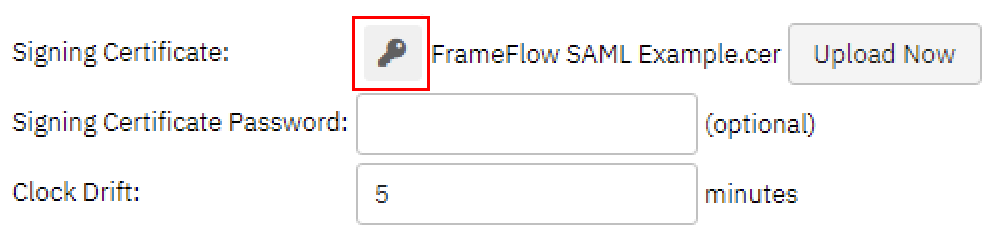
6. Press the "Upload Now" button, then click "Save Changes".
7. Make sure to check the box "Allow accounts to be created if they have no membership to the SAML groups above". At this point, you don't have any SAML groups set up and leaving this option unchecked will prevent new SSO users from gaining access to FrameFlow.
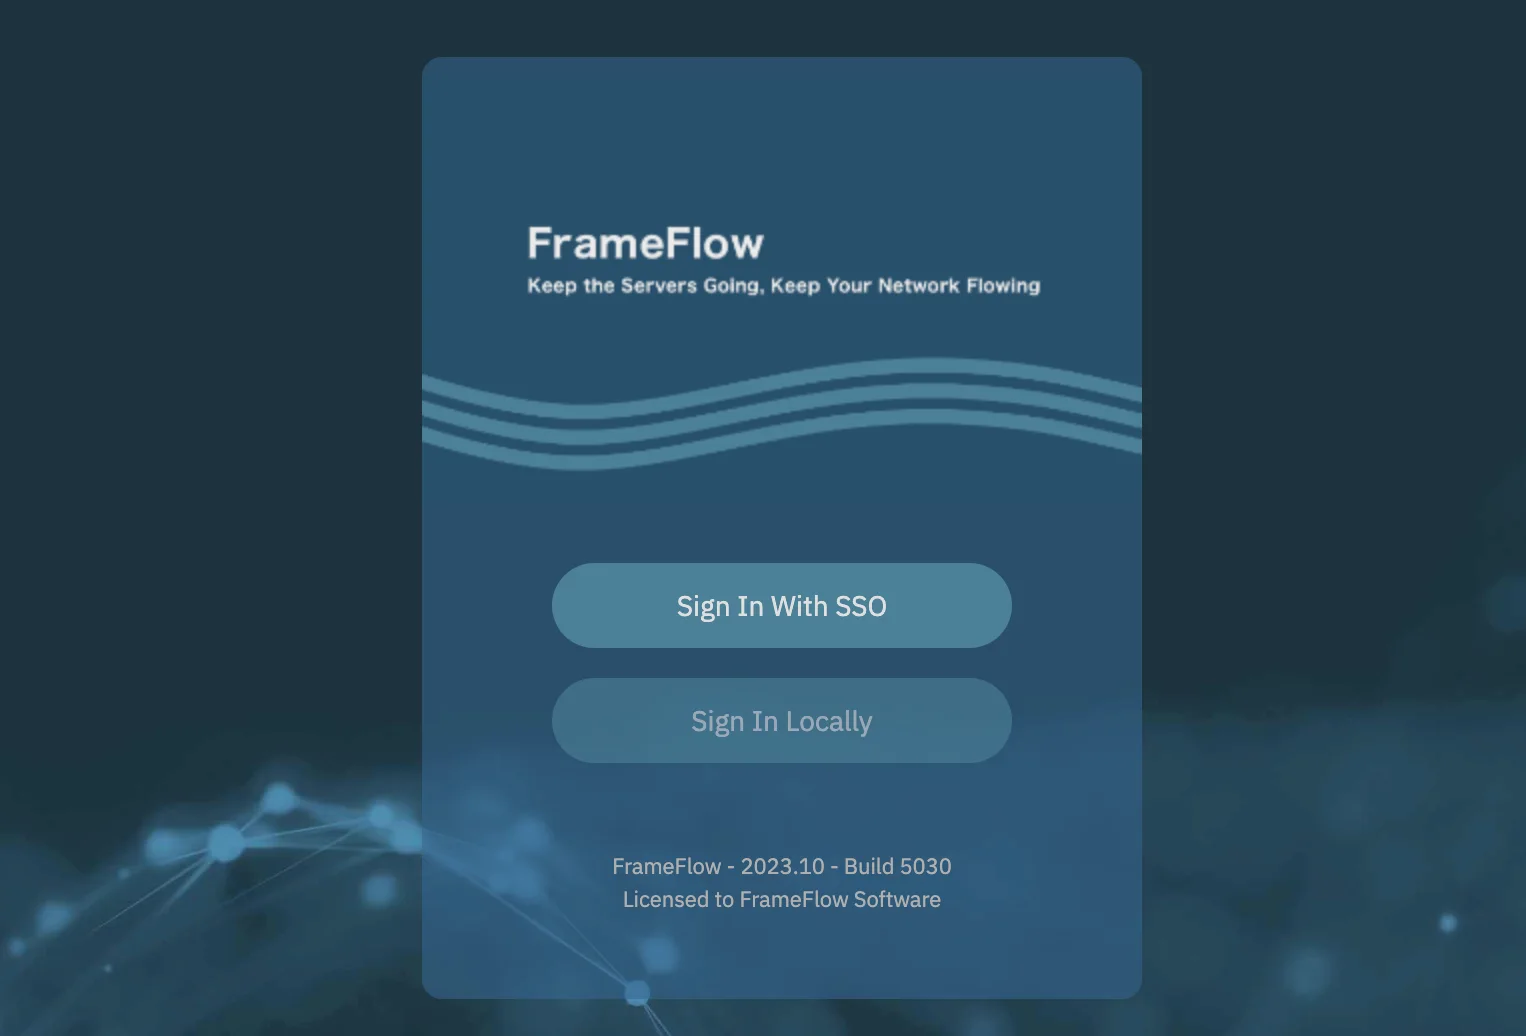
8. Now, when you're logged out of FrameFlow, you'll be greeted with an option that says "Sign in with SSO". Clicking this will take you to the login URL where you can sign in using your Azure credentials. After logging in, you're redirected back into FrameFlow where you are also signed in. Accounts are automatically generated in FrameFlow and added to the Everyone group. Any SAML user who logs into FrameFlow with single sign-on will automatically get an account in FrameFlow that’s mapped back to their SAML account. You can then assign these logins to any security group or role in FrameFlow. For additional information, check out our article on security roles, users and groups.
Tips and Considerations
Tip: At the bottom of the Login and Security section of FrameFlow's settings, there are options to only accept SAML logins. After setting up single sign-on, you can disable all other methods of authentication by checking this box.
The second box, if checked, will allow any member of the SAML groups you specify to receive an automatically generated FrameFlow account. If you want to restrict the users that will receive a FrameFlow account, leave this box unchecked.
