Day 5: Authentication
30 Days of FrameFlow
FrameFlow, the Agentless Monitoring Solution
Many network and server monitoring solutions use "agents" to get values from the machines they are monitoring. Agents are programs that run on remote machines and communicate with the main monitoring system. Because agents are required to be installed on monitored systems and they often require you to open a port so that the agent can communicate with the monitoring service, agents introduce the potential for vulnerability. Agents also require permissions and long-term maintenance, making them a less-than-ideal solution.
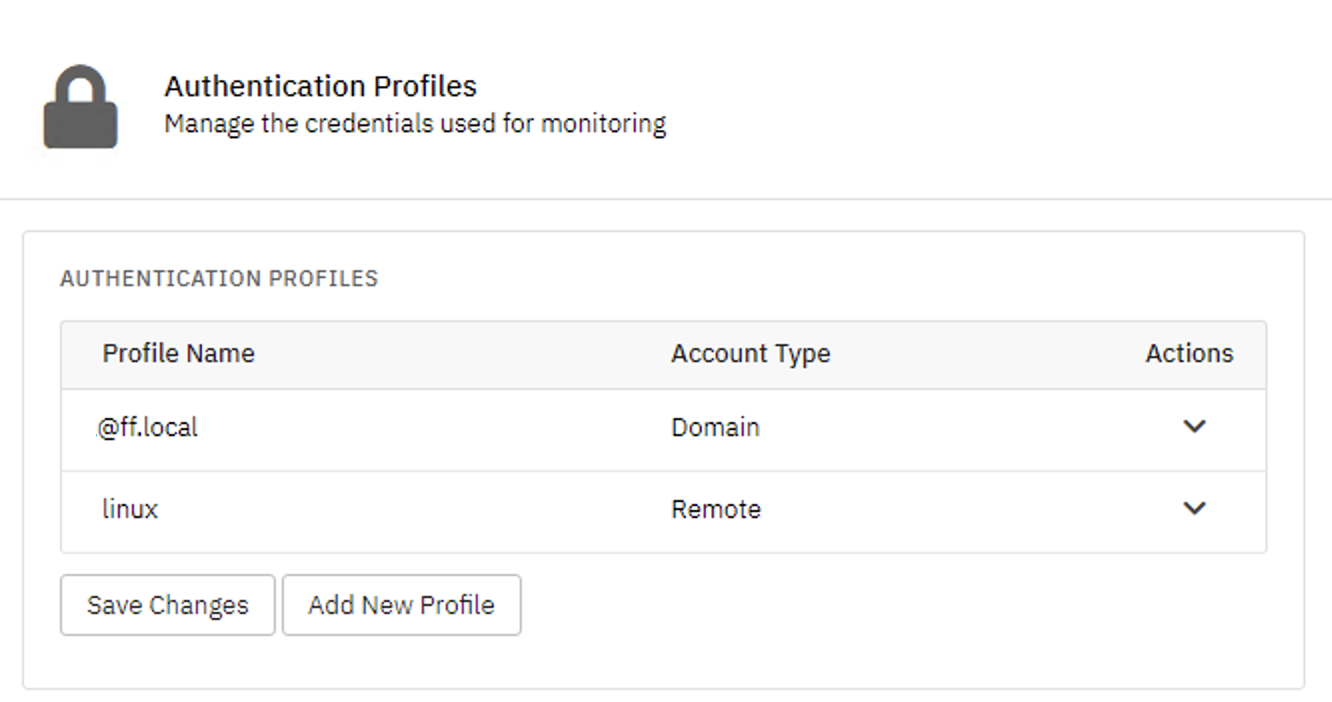
With FrameFlow, you'll never have to install anything on the systems you're monitoring. We are an agentless solution that connects to your devices using standard protocols. Monitoring this way ensures that everything plays by the rules of your organization's network security policies. Instead of using agents, we manage the credentials needed to connect to your network devices using authentication profiles. Authentication profiles are sets of saved credentials that you can use to authenticate between FrameFlow and the systems you're monitoring. Today, we'll go over each type of authentication profile and when to use them.
Types of Authentication Profiles
We have five different types of authentication profiles, each designed to help you authenticate with different systems. Let's review the types here, then show you how to set up your first profile.
Local Admin / Linux / Other
Local admin authentication offers the highest level of flexibility. With this type of authentication, FrameFlow contacts the box it needs to monitor and authenticates with it directly. Local admin authentication works across domains, from domains to workgroups and from workgroups to domains.

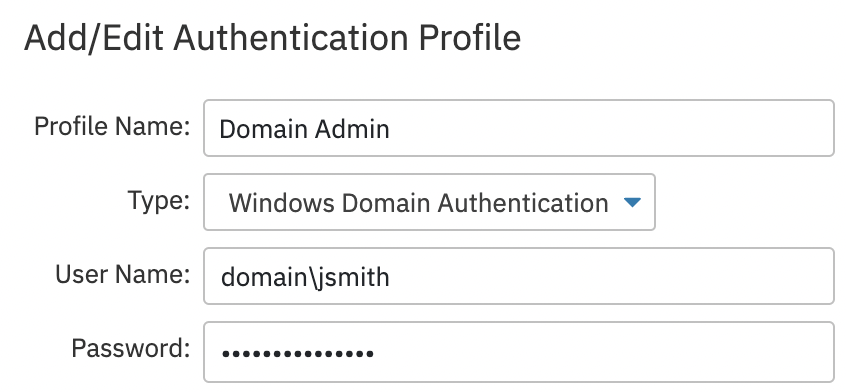
Windows Domain Authentication
With this option selected, your event monitors will authenticate with your domain controllers before trying to contact a monitored machine. If authentication is successful, the DC will give the event monitor a security token that FrameFlow will use to connect to the machine being monitored. Domain authentication is fast as domain controllers are optimized for handling authentication requests. The monitored machines will automatically accept the security token that was given to the event monitor.
SSH Private Key
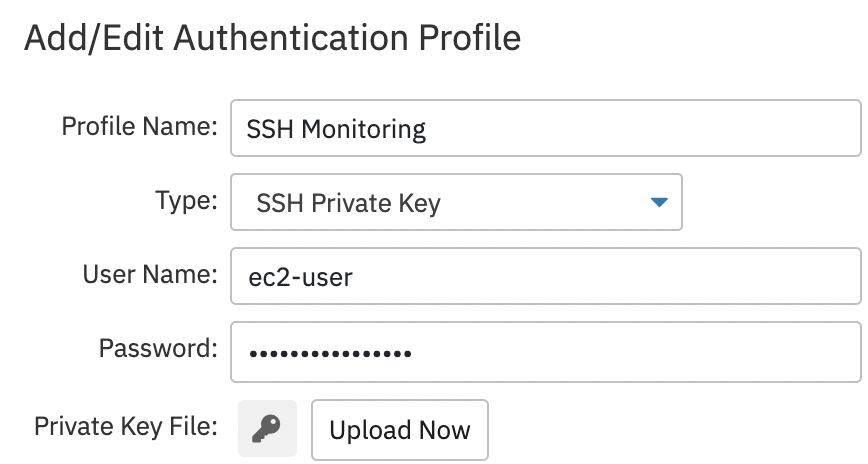
Linux systems — and some Windows systems — can be configured to use SSH keys for authentication. If you're connecting to a system using SSH private keys, select that option from the account type dropdown menu. A key icon will show up on the right-hand side of the screen. When you click it, a file chooser menu will open, allowing you to select the corresponding key file for authentication. After selecting your key file, click "Upload Now". Save changes and the SSH Private Key authentication profile is now ready for use.
Amazon AWS Credentials
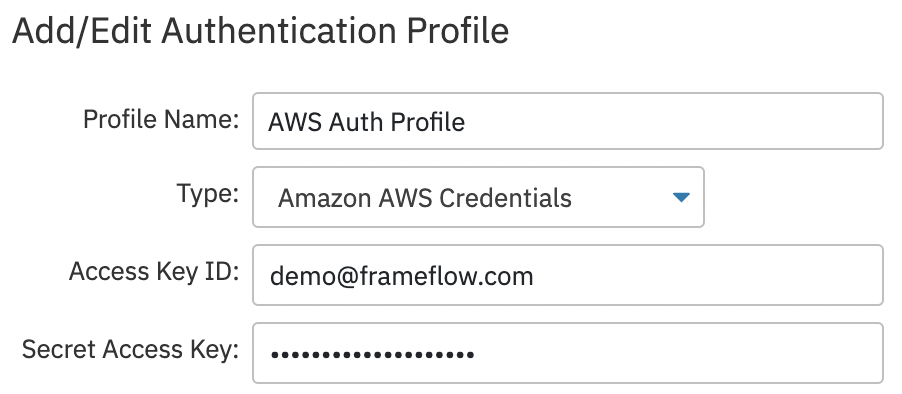
The Amazon AWS authentication profile option prompts you for an access key ID and a secret access key, which will be used to authenticate with FrameFlow. Both these keys are generated within your AWS console. This set of credentials is used with all AWS event monitors.
Microsoft Azure Credentials
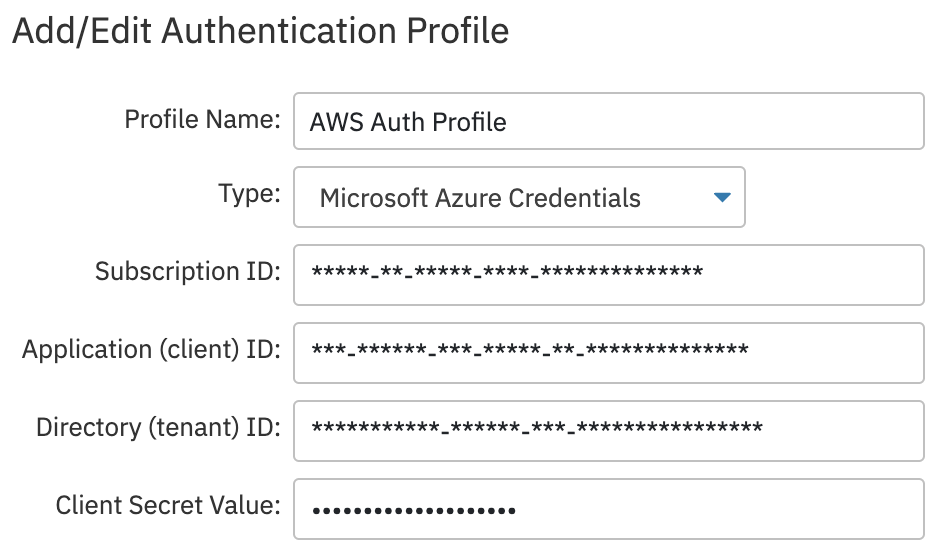
The Microsoft Azure authentication profile type is similar to the AWS one but contains more options. For this profile type, you need the subscription ID, client ID, tenant ID, and the client secret value. All of these values can be found in the Azure portal. Use this profile type for all Azure-based event monitors.
Setting Up an Authentication Profile
Now that you're a bit more informed about each type of authentication profile, you're ready to set up your first profile. Let's go step-by-step through the actions necessary to create one.
To begin, navigate to Settings > Authentication Profiles. From there, you can click "Add New Profile", which opens a window where you can choose the profile type and enter the necessary credentials. Each type of authentication profile requires slightly different credentials. In the below example, we set up a profile with Windows domain authentication.

Summary
Now, you should have a working authentication profile that you can assign to network devices and event monitors alike. Make sure you've got one ready for tomorrow's tutorial, where we'll dive into security in more detail.
| Day 4: First Event Monitors | Day 6: Security |
Table of Contents
Back to Menu
Day 1: Intro and Installation
Day 2: FrameFlow's Interface
Day 3: Network Devices
Day 4: Your First Event Monitors
Day 5: Authentication Profiles
Day 6: Security
Day 7: System Health Event Monitor
Day 8: Event Monitors by Category
Day 9: Headquarters
Day 10: Dashboards
Day 11: Alert Types
Day 12: PowerShell Scripting
Day 13: Event History
Day 14: Reports and Inventory Monitoring
Day 15: Network Monitoring
Day 16: Cloud Service Monitoring
Day 17: Cloud Cost Monitoring
Day 18: Activity Monitoring
Day 19: Maintenance Windows
Day 20: Dependencies
Day 21: VMware Monitoring
Day 22: Benefits of Organization
Day 23: Assigning Device Types
Day 24: Security Best Practices
Day 25: Database Monitoring
Day 26: Hardware Monitoring
Day 27: Installation Health Event Monitor
Day 28: Multi-Site and Remote Nodes
Day 29: Failover Monitoring
Day 30: More FrameFlow Resources